
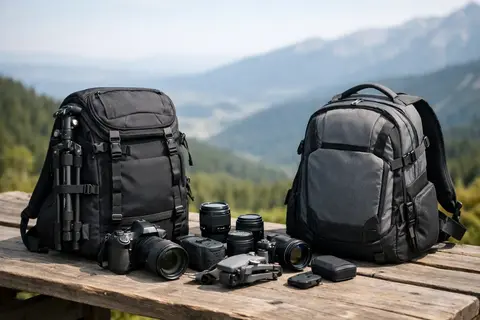
If your camera, lenses, and computer travel with you every day, choosing a bag is not an accessory question. A camera backpack review in this case is about working comfort, equipment safety, and how quickly you can access your gear at the moment the shot is already in front of you.
Photo and video equipment rarely consists of just one body and one lens. In one bag you often need to fit a camera, a 24-70 mm or 70-200 mm lens, spare batteries, memory cards, a filter, a microphone, a charger, and sometimes also drone or gimbal accessories. That is why a good backpack is not just a place for things. It must be able to distribute weight, protect against impacts, and at the same time maintain logical organization.
In brief
- Choose a bag based on the actual size of your kit, not your expected future needs.
- Check the bag at full load with the camera and attached lens to assess access and comfort.
- Prioritize proper weight distribution (hip belt, shoulder straps) if you carry 8+ kg of gear.
- If you shoot outdoors a lot, use a rain cover with the bag instead of relying only on water-repellent fabric.
- Choose the access type (side / back / front) according to your working style — for fast reportage, side access often works best.
What to choose for different tasks
| Task | Solution | Why |
|---|---|---|
| City reportage and street photography | Compact backpack with side access and a discreet exterior | Side access provides quick camera use without fully removing the bag; a discreet bag attracts less attention in the city. |
| Wedding and event photography | Medium or large backpack with good weight distribution and many compartments | Large capacity and clear organization let you keep spare bodies, lenses, batteries, and audio accessories within easy reach throughout the job. |
| Air travel | Universal backpack with a separate laptop compartment and standard carry-on dimensions | It is important to keep within external size limits and make room for personal items while protecting the camera and computer. |
| Nature and landscape photography | Ergonomic backpack with a ventilated back panel, rain cover, and space for tripod attachment | On long hiking sessions, back ventilation, stability, and weather protection are important. |
What the camera backpack is intended for
Before looking at the brand, color, or exterior design, it is worth defining the usage scenario. That is what determines whether you need a compact day bag, a travel backpack, or a spacious solution for professional work on location.
For a photographer moving around the city and shooting reportage, quick access to the camera and a sensible size are usually more important. For a wedding or event operator, capacity and comfort during long working hours are essential. Meanwhile, for nature photography or travel use, back ventilation, rain protection, and the ability to carry the bag comfortably for several hours at a time become decisive.
If the kit regularly also includes a laptop, tablet, or hard drives, the bag effectively becomes a mobile workstation. Then you need to look not only at the camera compartment, but also at a separate laptop pocket, document area, and cable organization.
Camera backpack review by the most important criteria
A good camera backpack review is not just a list of models. It is much more valuable to understand which parameters really affect daily work in practice.
Internal layout and compartments
The first question is whether the bag fits your kit not theoretically, but physically. Adjustable divider inserts are standard, but the difference lies in their rigidity and the logic of their placement. Too soft walls create instability, while too rigid a layout limits customization.
If you use a mirrorless camera with 2-3 lenses, a more compact solution will be enough. If you work with a full-frame body, telephoto lens, flash, and audio accessories, a bag with shallow pockets will quickly become uncomfortable. It is worth checking whether the camera fits into the bag with the lens attached. This significantly affects workflow speed.
Access type
This is where the compromises are pronounced. A back opening better protects against theft and accidental opening, but access is slower. Side access allows you to remove the camera faster, especially in reportage and travel work, but it is not equally convenient for everyone - it depends on which shoulder the bag is taken off.
A full front opening provides visibility, but in some models this also means a greater risk that the contents will be harder to secure if the bag is not packed properly. If speed is the priority, side access is very practical. If safety and order matter more, a back opening often wins.
Protection and materials
A backpack does not need to become a safe, but it should be able to protect equipment from everyday risks. A sturdier outer construction, thicker padding, and quality zippers are not cosmetic details. They directly affect the safety of the gear during transport.
Water-resistant material is useful, but do not overestimate it. Light rain is not the same as prolonged work in a damp environment. That is why a good rain cover is in many cases more valuable than simply water-repellent fabric. If you regularly photograph outdoors, this point is not optional.
Comfort under full load
An empty bag can seem comfortable almost always. The real difference starts when you put 8-12 kilograms of gear into it. The width of the shoulder straps, the shape of the back panel, the hip belt, and the chest strap determine whether the bag will be bearable after four hours.
For a heavier kit, it is preferable for the backpack to transfer part of the load to the hips rather than only the shoulders. This is especially important for videographers and event operators. For compact city use, such a solution may be unnecessary because it makes the bag bulkier.
Space for a computer and personal items
Many users mistakenly choose a bag only by the camera compartment. As a result, the laptop, hard drive, headphones, notepad, or jacket are stuffed wherever there is free space. This is not a sustainable solution.
If the backpack is intended for work outside the studio, a separate laptop compartment is almost mandatory. Even better if there is a small top section for personal items. Otherwise, you will have to carry two bags or compromise on organization.
When a compact model is enough and when you need a larger one
A smaller bag is lighter, more mobile, and more convenient for everyday movement. It works well for one body, 2-3 lenses, and the minimum accessories. Such a solution is often chosen by street photographers, content creators, and travelers who do not want to carry their entire arsenal.
A larger backpack is justified when the kit is more extensive or the work involves unpredictable situations. For example, one assignment may require both a photo camera and video accessories, and a drone. Then the extra volume becomes a safety reserve rather than unnecessary weight.
However, size is not an advantage by itself. A bag that is too spacious and only partially filled creates movement and instability. The gear inside can shift if the dividers are not secured properly. That is why the ideal bag is not the largest possible one, but the one that matches your actual kit.
For travel, the city, or professional work
For city use, a discreet appearance and quick access are important. Here, backpacks that do not look too technical and do not attract unnecessary attention often win. They are suitable for everyday photo work, client meetings, and moving around by public transport.
On trips, weight, dimensions, and versatility come to the forefront. If the bag has to be taken into the cabin, its external dimensions become just as important as its capacity. Tripod mounts are also useful, as is the ability to allocate part of the volume to clothing or personal items.
For professional work on location, higher durability and clearer organization are usually required. Here, minimalism is less important than practical functionality. If you frequently change lenses, batteries, or audio accessories during the day, every item should have its own place and be accessible without unnecessary movement.
The most common mistakes when choosing a backpack
The first mistake is buying a bag for a future kit rather than current needs. If you plan to buy three more lenses someday, that does not mean you should already carry a half-empty large bag today.
The second mistake is focusing only on the exterior design. Aesthetics are pleasant, but in photo and video work it is much more important how the bag opens, how it distributes weight, and whether everything inside is intuitively accessible.
The third mistake is ignoring the overall system. If you use a tripod, gimbal, microphone, or drone, the bag should be evaluated as part of the entire equipment workflow. Sometimes the best solution is not one maximally large backpack, but a well-thought-out division between a backpack and a separate accessory bag.
How to practically check whether the bag will fit
If possible, it is worth testing the bag with actual equipment or at least according to size logic. Check whether the camera with the mounted lens fits without pressure, whether there is space in the compartments for batteries and a charger, and whether the laptop is not in a zone where it can be squeezed by other equipment.
It is also important to put the bag on when fully loaded. Sometimes a model that looks compact and well thought out on the table turns out to be too wide or uncomfortable on the back. This especially applies to users who move around a lot on foot or work long shifts.
If the equipment is needed for a specific project, it is not always necessary to make a long-term purchasing decision right away. In some situations, it is more useful to first clarify the kit itself and only then choose a bag that truly matches it. At this stage, practical advice in a specialized photo and video equipment environment, such as Master Foto, comes in handy.
A camera backpack is one of those choices that is judged not on the day of purchase, but during the first intense working week. If the bag helps you work faster, more safely, and without unnecessary fatigue, then it is correctly chosen even if it initially cost a little more.
Frequently asked questions
How do I determine how large a backpack I need?
Start with your everyday kit — place in the camera with the lens you use most often, batteries, and memory cards. If you plan to carry a laptop or drone, choose a model with separate compartments, but do not overbuy for the future so you do not end up with unnecessary bulk.
Is side access better than a back opening?
Side access is usually faster and more convenient for reportage and travel work, while a back opening offers better theft protection and lets you rearrange the bag more securely. The choice depends on your priorities — speed versus security and organization.
Is water-repellent fabric enough, or do I need a rain cover?
Water-repellent fabric protects against brief moisture, but in prolonged rainy conditions a dedicated rain cover is the safer solution. If you regularly work outdoors, a rain cover is recommended in addition to the bag material.
How do I test the comfort of a bag in the store?
Put the bag on with a full load (or at least a similar weight) and carry it for 5–10 minutes, adjusting the straps and hip belt from time to time. Pay attention to shoulder pressure, back ventilation, and whether the bag rubs or slips while moving.
How important is a separate laptop compartment?
If you often work outside the studio with a laptop, a separate and padded laptop compartment is essential to prevent scratches and pressure from camera gear. It also improves organization and allows quick access to work files.
How do I avoid choosing an oversized bag for the "future"?
Take your real inventory and assess how often you will use additional lenses or accessories. It is better to choose a bag that precisely matches today’s kit and expand organization with separate accessory pouches if you need more space.
Useful links
- Backpacks - A wide selection of backpack models that suit different kits and use scenarios.
- Rain protection - Additional rain covers and protection solutions recommended for working in wet conditions.
- Tripod accessories - Mounts and accessories for tripods that are useful for a photographer who also wants to carry a tripod or mounts in the bag.
- Drone accessories - Solutions and accessories if the bag needs to be used together with a drone or drone accessories.
- Photo tripods - Tripod models and sizes worth considering when planning the bag’s external attachments and capacity.