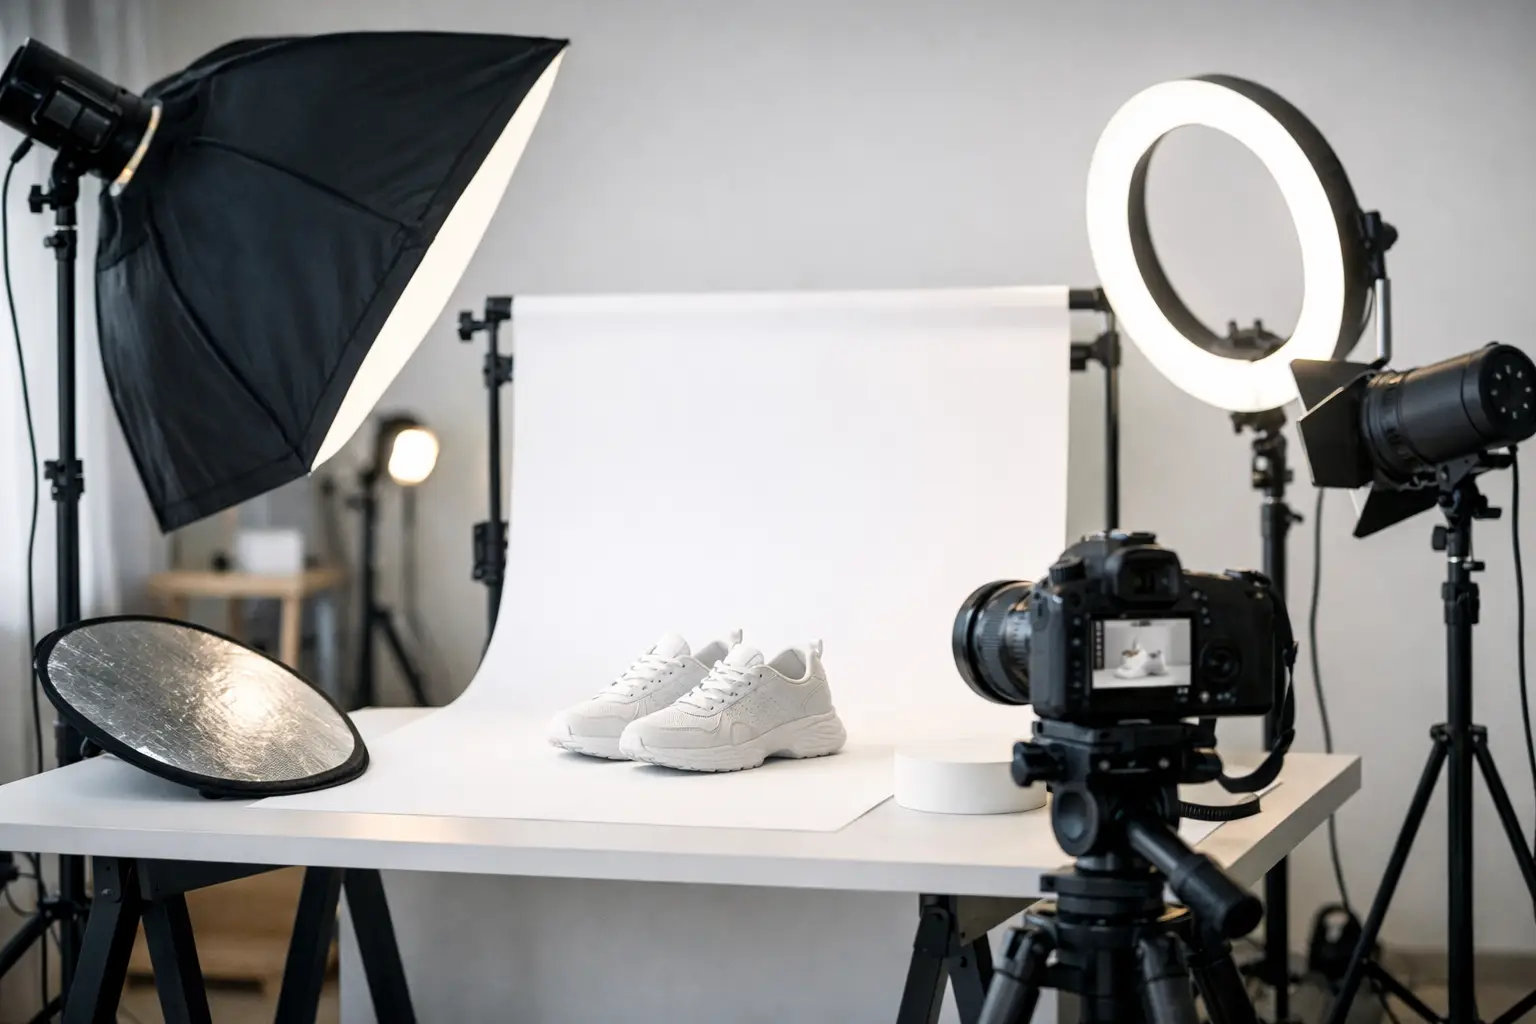
If product photos look unevenly lit, with hard shadows and different colors in each frame, the problem usually is not the camera alone. More often, what’s missing is a properly assembled workspace. That’s why an example of product photo studio equipment is a good starting point - it helps you understand what is truly needed, what is optional, and where there is no point in overpaying.
In brief
- A controllable environment and consistent light are more important than the most expensive camera.
- To start, a camera, 1–2 lenses, two lights, a softbox, a tripod, and a white background are enough.
- A softbox, diffusion, and reflectors quickly improve product image quality and reduce harsh shadows.
- Rental is a good option for seasonal needs or for testing expensive equipment before buying.
What to choose for different tasks
| Task | Solution | Why |
|---|---|---|
| E-commerce images on a white background | Photo table or white paper background, two continuous lights or flash units with a softbox, a stable tripod, and a 50 mm lens | A white background and stable light ensure consistency and fast processing for catalogs or an online store |
| Photographing small products (jewelry, cosmetics) | Macro lens, light tent or dense diffusion, reflectors, and precise focusing | Small items require detail and minimal distortion, which macro optics and diffusion provide |
| Photography of reflective surfaces (glass, metal) | Several controlled light panels, a stripbox or elongated softbox, flags, and precise light shaping | For reflective objects, controlling highlights and soft, elongated reflection lines is important |
| Fast batch shots on a white background (high volume) | Stable background system, flash units with fast recycling, additional fill light, and tethering for workflow | An efficient workflow and fast flash recycling speed up batch photography and ensure tonal consistency |
| Lifestyle or advertising compositions | A more flexible kit: several light modifiers, colored backgrounds, additional props, and sturdier stands | Commercial materials and lifestyle shots require creative light shaping and flexibility in the kit |
Frequently asked questions
How do I choose between continuous light and studio flash units?
If you want to see the light effect immediately and work a lot with video, choose continuous light. If you need maximum power, a short burst, and low ISO for commercial photography, studio flash units are better. Also consider the workload and skill level, because flash units require more knowledge in synchronization and settings.
Do I need an expensive camera to start?
No — controllable light and a good lens often provide a bigger improvement than a more expensive camera. To start, a mid-range device and investment in lighting, a tripod, and a background are enough. Camera power becomes more important only with special requirements or very large formats.
Which lenses should I choose for product photography?
Usually safe choices are 50 mm and 85 mm portrait-range lenses, as well as a macro lens for smaller objects. A macro lens provides precise focusing and less distortion for small products. Wide-angle lenses are generally not recommended because they can distort proportions.
How many light sources do I need for a small product studio?
Often two light sources are enough: a key light and a fill light. A third source is useful for the background or as control lights with reflective and mirror-like surfaces. Light quality and modifiers usually have a bigger effect than simply increasing power.
How do I achieve consistent colors between shots?
Use a color chart, fix white balance settings, and if possible, tethering or RAW format. Stable lighting and identical background surfaces help reduce color variation. In post-processing, use consistent profiles or LUTs to maintain consistency.
When is it better to rent rather than buy equipment?
Rental is beneficial for seasonal campaigns, one-off catalogs, or testing powerful equipment before purchase. It lets you try specialized modifiers or expensive flash units without large upfront costs. If you shoot regularly and often, a basic kit usually pays off when bought.
Useful links
- Lenses - View the lens selection — macro, portrait, and specialized solutions for product photography.
- Studio flash units - Evaluate studio flash models if you need more power and faster recycling.
- Photo backgrounds - Review the selection of paper, fabric, and other background solutions for consistent white or colored backgrounds.
- Stands - Choose stable stands that ensure repeatable framing and safety when setting up equipment.
- Softboxes - Review softbox sizes and mounts to quickly soften light and reduce shadows.
- RENTAL - Consider renting specific equipment for seasonal needs or testing before purchase.
In product photography, the most important thing is not the most expensive equipment, but a controllable environment. For e-commerce needs, catalogs, social media, and advertising materials, a repeatable result is required. That means stable light, accurate framing, a suitable background, and accessories that allow you to work quickly.
Example of product photo studio equipment for a small studio
A practical kit for a small product studio usually starts with a camera, lens, two or three light sources, a tripod, a background system, and a few light modifiers. That is enough to photograph cosmetics, shoes, accessories, electronics, packaging, and many other items that fit on a table or in a small shooting area.
The camera is important here, but not always decisive. If you are photographing static products in a controlled environment, lighting and optics play a much bigger role. That is why it is often wiser to choose a mid-range camera and invest in quality studio lighting rather than the other way around.
When choosing a lens, a safe option is a 50 mm, 85 mm, or macro lens depending on the size of the product. For smaller items, a macro lens gives more precise focus and less distortion. For larger items or overview shots, a classic portrait focal range is often enough. Very wide lenses are usually not the first choice in product photography because they can distort shapes.
Light determines the result more than the camera
In product photography, continuous light or studio flashes are most commonly used. Both solutions have their advantages. Continuous light is easier for beginners because you can immediately see how the light falls on the object. It is especially convenient for working with small items, creating video content, and situations where quick setup is needed without additional synchronization.
Studio flashes, on the other hand, provide more power, faster work, and a cleaner result when many products need to be photographed in the same style. They are useful when you need to achieve low ISO, very sharp detail, and even lighting. The downside is a higher level of initial complexity and the fact that a beginner must first understand synchronization, power, and light ratios.
For a small studio, two light sources are often enough. One serves as the main light, the other helps fill shadows or illuminate the background. A third light source is useful when photographing reflective products, glass, metal, or items with transparent surfaces. In such cases, control over the light becomes much more important than the power itself.
Softboxes, stripboxes, and diffusion solutions
If one accessory can be named that improves product photos the fastest, it is a softbox. It softens the light and helps reduce harsh shadows. A square or rectangular softbox works well with most products. A long stripbox is especially useful for bottles, glass, and other surfaces where a clean, controlled reflection matters.
Sometimes a softbox alone is not enough. Then diffusion fabrics, reflectors, and flags that block unwanted reflections come in handy. Product photography is not just about adding light. It is equally important to understand where to remove light. That is how you get clean edges, a clear shape, and a professional product appearance.
The background and shooting surface are not just decoration
A white background is the most common solution for e-commerce, but not the only one. Depending on the channel, a gray, black, or textured background may be needed. The main thing is predictability - the background must be easy to reproduce and simple to maintain. Paper backgrounds are practical here because they can be replaced quickly and provide an even surface without seam lines.
For small products, a shooting table or light tent is also very useful. A light tent helps illuminate the object evenly and reduces the struggle with reflections, especially for beginners. However, it is not a universal answer. For some products, the result can become too flat, lacking form and character. If a more commercial, higher-contrast image is needed, an open shooting setup with separately controlled light provides more possibilities.
When a table studio is enough
If you are photographing jewelry, cosmetics, small electronics, food packaging, or other compact products, a table studio is often the most rational solution. It takes up little space, requires less light power, and allows you to standardize shots quickly. For shoes, bags, interior items, or larger products, however, you need to think about a full-height background, more stable stands, and a wider light setup.
Tripod, triggers, and small things that save time
The quality of product photos is often determined by details that initially seem secondary. A stable tripod is one of those purchases that pays off immediately. It allows you to maintain the same framing, work with a lower ISO, and compare shots precisely between different products. If a series of products is being photographed, a tripod is not an extra convenience but a working tool.
A remote shutter solution, tethering capability, and a color chart for more precise post-processing are also useful. If the client or marketing team expects consistent colors in the catalog, white balance cannot be left to chance. This is especially important for clothing, cosmetics, and brand packaging, where differences in tone create a direct commercial problem.
Among accessories, clamps, sandbags, extra batteries, extension cords, and background supports are often underestimated. They may not sound impressive, but they are exactly what makes a workspace safe and efficient. If a light stand is unstable or the background moves with every adjustment, photography becomes slower and less accurate.
The type of product changes the equipment choice
There is no single universal kit for all situations. An example of product photo studio equipment for clothing will differ from a kit for watches or glass bottles. Reflective surfaces require more light control and larger diffusion panels. Small items will need a macro lens and precise focusing. Larger products increase the need for more powerful lights and a wider shooting area.
If you are photographing only white-background shots for an online store, the priority will be speed and consistency. If you are also creating advertising visuals, social media campaigns, and lifestyle compositions, the equipment needs to be more flexible. Then the need for additional light modifiers, colored backgrounds, prop tables, and more precise light shaping appears.
Buy or rent
This is a practical question, not just a budget question. If product photography is done regularly, your own basic kit is usually more cost-effective. It saves time because everything is adapted to a specific working style and the process does not need to be rearranged before each project.
On the other hand, renting is logical if you need to complete a seasonal campaign, a one-time catalog, or test a specific solution before purchasing. This especially applies to more expensive light sources, specific modifiers, and specialized optics. Such an approach reduces risk and allows you to verify whether the chosen equipment really fits the task. Here, the advantage of a specialized retailer and rental center is obvious - you can not only compare categories but also receive advice on what will work best for a particular product.
A sensible starter kit
If you need a simple reference point, an entry-level studio only needs a camera, a standard or macro lens, two lights, one larger softbox, one reflector or stripbox, a stable tripod, and a white background. Such a kit makes it possible to create a large share of commercially usable product images without excessive investment.
If the workload grows, the next step is usually not a new camera. More often, it is more useful to add a third light, better stands, more precise color control, and additional backgrounds. These are the improvements that make the studio more productive. In practice, clients often come to the conclusion that workflow stability is improved more by a well-thought-out system than by one flashy purchase.
A good result in product photography starts not with the longest list of specifications, but with a clear task. If you know what you will photograph, for which channel, and how often, it is much easier to find a suitable studio kit.