
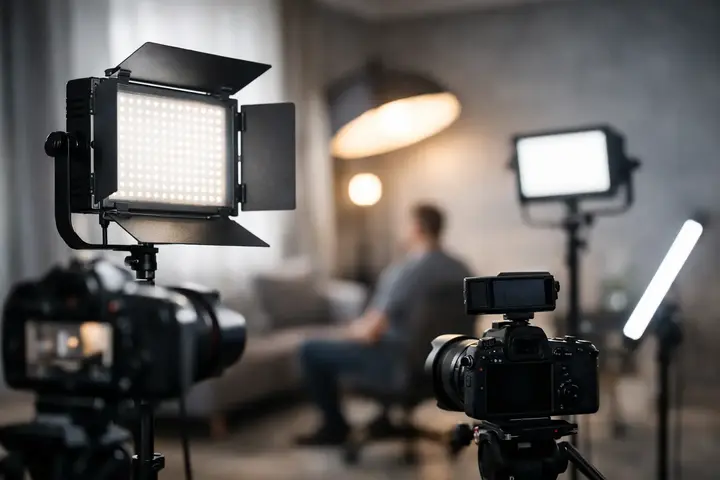
When filming an interview in a small office or photographing a product for an online store, light often determines the result more than the camera body. That is why the question of how to choose an LED panel is not just about power or price. You need to assess what and where you will be filming, how close the light fixture will be to the subject, whether accurate color reproduction is required, and how the specific panel will fit into your workflow.
LED panels are popular because they provide continuous light, consume relatively little power, and let you immediately see the lighting effect in the frame. They are practical for content creators, photographers, video teams, studios, and companies producing social media, advertising, or product content. However, LED panels with the same name can differ greatly in light quality, control options, and practical usability.
In brief
- Start with the task: choose a panel based on typical shooting distance, mobility needs, and color requirements.
- Check brightness (lux/m) relative to the intended distance and remember that diffusers reduce output.
- Prioritize color accuracy (CRI/TLCI) for professional video and product photography.
- Evaluate power options (mains, V-Mount, USB-C) and mounting solutions according to the workflow.
- Include the necessary accessories in the purchase (diffuser, grid, stand) or consider renting equipment for specific projects.
What to choose for different tasks
| Task | Solution | Why |
|---|---|---|
| Studio interviews (single speaking person) | Medium or large bi-color LED panel with a softening diffuser and a stable stand | A large-area panel creates soft light with pleasant shadow transitions, while bi-color allows adjustment to the room tone. |
| Product photography for an e-shop | Uniform panel surface with high CRI and light modifiers (softbox, grid) | For businesses, accurate color rendering and controlled reflections are important, which are provided by a diffuser and grids. |
| Mobile documentary filming / outdoor events | Compact panel with USB-C or battery support (preferably V-Mount if longer operation is needed) | Mobility and quick setup are more important than maximum power; battery options provide movement without cables. |
| Solo operators and vloggers (on-camera mount) | Smaller, lightweight panel with a cold shoe mount and built-in battery | Compact solutions are more convenient for on-camera use and provide fast operation without extra equipment. |
| Studio sessions with multiple light sources | Panels with mains power or V-Mount support and the ability to control group lighting (DMX/Bluetooth/APP) | Consistent lighting and centralized control reduce setup time and ensure reproducible results. |
Start with the task, not the specification sheet
First define the panel’s main role. For a talking-head video of one person, you usually need a key light with soft, controllable illumination. In product photography, even lighting and reliable colors will matter. In event coverage or outdoor shooting, mobility, battery power, and sufficient power reserve more often become decisive.
An LED panel is not necessarily a universal solution for every job. A small, lightweight panel is convenient on-camera, in a small home studio, or as an accent light for the background, but it rarely replaces a powerful key light in a larger room. Conversely, a large studio panel can be very effective for interviews, but it will become a burden on a hike or in dynamic documentary shooting.
Before comparing options, answer three practical questions: what is the typical shooting distance, how often will you work outdoors, and whether the light needs to be carried by one person. These answers quickly narrow down the most suitable category.
How to choose an LED panel by brightness
Manufacturers may specify panel brightness in lux, lumens, or other measurements. In a purchase decision, the most useful is usually illumination in lux at a specific distance, such as one meter. It shows how intensely the panel will light the subject in a particular situation. However, this figure should also be read carefully, because the measurement may have been taken with a narrower beam angle or at a specific color temperature.
Brightness alone is not a measure of quality. If the panel is placed very close to the person, even a moderate-power model can provide sufficient exposure. If the light has to be placed two or three meters away, illuminate a group of people, or compete with daylight from a window, significantly more power is needed. Light intensity drops rapidly with distance, so it is not enough to choose a panel based on the feeling that it looks powerful in the catalog.
If you plan to use a diffuser, softbox, or other light modifier, account for light loss. This is a deliberate compromise: softer light on a face or a shiny product usually looks better, but it requires more initial power. In a small room this may not be critical, but in a larger studio or when filming at a high frame rate, power reserve becomes essential.
Panel size affects the character of the light
A larger light-emitting surface placed relatively close to the subject creates softer transitions between light and shadow. That is why a medium or large panel is often more suitable for an interview than a very small, concentrated light source. A small panel, on the other hand, is valuable as a rim light, background accent, or light for details.
If you need visually expressive, directional lighting, a panel without additional light-shaping tools is not always the optimal choice. In such cases, it may be useful to consider an LED monolight with a reflector, Fresnel lens, or projection attachment. A panel is especially convenient when the priority is a broad and even light field.
Color temperature and color accuracy
A bi-color LED panel lets you adjust color temperature, usually in a range from warm tungsten light to cooler daylight. This solution is practical when you need to adapt to room lighting, window light, or different shooting conditions. A daylight panel with a fixed color temperature is often simpler and can sometimes provide more power for a similar budget, but its flexibility is lower.
A color-adjustable RGB or RGBWW panel can, in addition to white light, create saturated color accents and lighting effects. It is useful for music videos, creative portraits, podcast backgrounds, and advertising content. However, RGB functionality is not a reason to overpay if, in everyday use, you only need stable white light for product filming or interviews.
Pay attention to CRI and TLCI values. CRI describes color rendering overall, while TLCI is especially useful in video work because it evaluates how suitable the light is for camera capture. High values usually mean more natural skin tones and more accurate product color reproduction. However, you should not choose a model based on a single number alone. Manufacturer measurements can differ across different modes and color temperatures.
In practical work, the issue of green and magenta shift is also critical. Cheap or poorly calibrated LED lights can create a slight but visible unwanted tint in the frame. This can be corrected in post-production, but when filming with multiple cameras, different lights, or large amounts of content, such correction takes time. For professional work, stable color quality is often more valuable than extra modes.
Power, mounts, and control on set
In the studio, panel lights with mains power are convenient, especially for long interviews, live streams, and product filming. For mobile work, it is important to check what type of batteries the panel supports, how long it will run at full power, and whether the necessary power accessories are included in the set. V-Mount batteries are generally suitable for more powerful lights and longer work, while compact panels often use smaller battery formats or USB-C power.
The mounting solution is also important. A reliable U-shaped bracket allows precise adjustment of the panel’s angle on a light stand. For compact models, a cold shoe mount or a stand thread is useful. Check whether the panel can be safely positioned where needed, especially if you will use a diffuser, grid, or battery.
Control options become important when you use multiple lights. Physical control buttons are quick and reliable, but apps, Bluetooth, DMX, or wireless remotes let you change settings without interrupting the shoot. For a single panel in a home studio, these features may not be decisive. For a team with multiple light sources, they help maintain consistent lighting and save time.
Don’t forget about light shaping
Even the highest-quality LED panel without light-control accessories will not always deliver the desired result. A diffuser softens the light, a grid reduces spill onto the background and walls, and black flags help prevent unwanted reflections. In product photography, these accessories often determine whether the reflection on metal, glass, or packaging is controlled.
Check what is included in the package. Some panels already come with a diffuser and a carrying case; for others, the necessary accessories must be purchased separately. A cheaper panel can become less economical if you later have to look for mounts, a power supply, batteries, and a light softener. A proper budget includes not only the light itself, but the entire system that will actually make it work.
When to buy and when to rent an LED panel
If the panel will be a daily work tool for regular content, buying it is usually justified. It allows you to keep the same lighting setup and start filming quickly. For a one-off project, a larger shoot, or an unusual creative task, renting gives you the option to use more powerful or more specialized lighting without a long-term investment.
Rental is also a practical way to test the panel’s size, control system, and light character in real work. Before buying, it is worth comparing how well the specific model connects with your stands, batteries, and existing light modifiers. Master Foto consultation or equipment rental can help reduce this selection risk, especially when assembling several light sources for one project.
The right LED panel is not the one with the longest feature list. It is the panel that delivers the light quality you need in your typical shooting location, is powerful enough with the accessories you use, and does not slow down your workflow. Start with the specific shot you want to achieve, and the choice will become much more precise.
Frequently asked questions
How do I understand how powerful an LED panel I need?
Assess the typical shooting distance and whether the light will be softened with a diffuser. Check the panel's lux or lumen ratings at one meter and compare them with the intended use case.
Is it better to choose a bi-color or fixed color temperature panel?
Bi-color panels provide flexibility to match the room lighting without recalibrating the light. If you always work in uniform conditions and power at a lower price is important, a fixed daylight panel may be sufficient.
How important are CRI and TLCI ratings?
High CRI and TLCI usually mean better color rendering, which is especially important for portraits and product photography. However, manufacturers' measurements can vary, so practical testing in real work is recommended.
What accessories are essential when buying an LED panel?
Most often, a diffuser, grid, and a reliable stand or U-bracket are useful, as well as suitable power solutions and a carrying bag. Without them, the panel may not be versatile enough for your typical work.
Is it better to buy or rent an LED panel?
If the panel will be a regular tool, buying usually pays off because it ensures consistent availability. Renting is recommended for testing, specific projects, or when you need access to more powerful equipment without a long-term investment.
How do you deal with green or magenta color shifts in light?
Minor shifts can be corrected in color grading during editing, but it is better to reduce the amount of work with shifted lights by using higher-quality panels or profiling. If you use multiple cameras or lights, consistency across light sources saves time in post-production.
Useful links
- LED gaismas paneļi - Category with a wide selection of LED panels, useful when the reader needs to evaluate different sizes and types of panels.
- Gaismas veidotāji - Grids, snoots, and other light-control accessories mentioned in the article and essential for shaping light.
- Caruba Pop‑Up Lightbox 120cm - A practical product for product photography and providing even light for small items.
- Video gaismas (noma) - A rental option allows you to try more powerful panels or special lights before deciding to buy.