
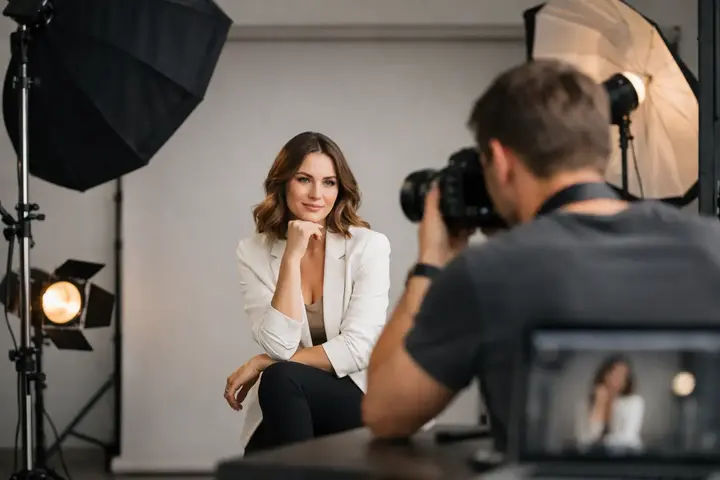
When you turn on studio lights for the first time, the problem is usually not a lack of light. Usually there is too much of it, it falls at the wrong angle, or the result in the frame does not look the way it did in real life. That is exactly why the question of how to photograph with studio lights is not just about switching on lamps, but about a controlled, repeatable result.
The biggest advantage of studio lighting is predictability. If you understand how light behaves, you can precisely influence shadows, skin tone, background brightness, and the overall mood of the image. This is important for portraits, product photography, and e-commerce content alike, where consistency is often just as essential as creativity.
In brief
- Start simple: one main light + modifier + reflector often gives better, repeatable results than a mess of multiple light sources.
- Work in manual camera mode: ISO 100–200, shutter speed matched to flash sync (e.g., 1/160–1/200 s), aperture based on the depth of field you need.
- The modifier defines the character of the light — softbox/octabox softens, snoots/grid focus it; distance from the source changes softness.
- If the subject is shiny, use a larger, softer light source, and control reflections with grids, flags, and precise positioning.
- Make test shots at a larger size and adjust the angle, distance, or modifier, not just the power.
What to choose for different tasks
| Task | Solution | Why |
|---|---|---|
| Portraits — artistic, natural portrait | Single key light setup at a 45° angle + reflector on the opposite side; use a softbox or octabox as the modifier. | A simple setup creates volume in the face, controls shadow transitions, and makes the image repeatable. |
| Product photography — matte objects and packaging | Use a softbox or light box, fixed aperture f/8–f/11, and soft, even lighting. | Reduces reflections, ensures clear lines and readable labels on packaging; deeper DOF provides more sharp details. |
| Product photography — shiny objects | Large, soft light source, grids or snoots to control reflections; use a product photo table or diffusers. | Controls specific reflection areas and preserves the material look without unpleasant point-like glare. |
| Testing or one-off projects | Consider renting equipment to try different modifiers, flashes, and LED solutions before buying. | Saves money and lets you compare solutions in real working situations. |
How to photograph with studio lights without overcomplicating things
At the beginning, you do not need a complicated four- or five-light setup. In practice, most good results start with one main light, one modifier, and a clear understanding of what you want to illuminate. If you try to use several lights at once without control, it will be harder to understand which one is creating unwanted shadows or overexposed areas.
The most important thing is to start with a base setup. Place the main light at about a 45-degree angle to the model or object and slightly above eye level if you are photographing a portrait. This placement is a safe starting point because it creates volume in the face and allows shadows to look more natural than front lighting.
If you are photographing a product, the light placement will depend on the surface. For shiny objects, you need to think not only about the object itself, but also about reflections. Sometimes you are not lighting the product directly, but a diffuser or a white surface from which the light reflects more softly.
The most important camera settings
In studio work, manual mode is usually used. It gives full control over exposure and helps keep the result consistent from frame to frame. If the camera tries to adjust settings on its own, consistency is lost, especially in burst shooting.
Usually you start with a lower ISO, for example 100 or 200, to get a clean file with maximum dynamic range. Shutter speed is set according to the flash sync limit, often around 1/160 s or 1/200 s, depending on the camera. Aperture, in turn, determines both exposure and depth of field. In portraits, f/5.6 to f/8 is often used, while product photography often needs f/8 to f/11 so that the object is sufficiently sharp across the important area.
If you work with continuous LED light, shutter speed becomes even more important, because it affects not only the ambient environment, but also the main lighting itself. With flashes, the situation is different - light output is largely determined by the flash intensity itself, not the shutter speed. This difference often confuses beginners.
One light can be completely enough
One light is not a compromise. It is a good method for understanding the direction of light, contrast, and shadow shape. If you use a softbox, the light will be softer, with gentler transitions. If you use a reflector or beauty dish, the light will be more pronounced and contrasty.
In portrait work with one light, distance is especially important. The closer the light source is to the subject, the softer the light will be. The farther away you place it, the harder the shadows will become and the contrast will increase. This means that you do not always need to change power - often it is enough to move the light half a meter closer or farther away.
To keep the shadow side from becoming too dark, you can use a reflector. It is a simpler and often more precise solution than immediately adding a second light. A reflector preserves a natural transition and helps avoid making the image flat.
How to photograph with studio lights when using multiple lights
The second light is usually added for a specific task. It can serve as fill light to soften shadows, as a background light to separate the model from the background, or as a rim light that highlights the hairline and shoulders. Each additional light should solve a specific visual need, not simply be in the frame because it is available.
If you add fill light, it usually should be weaker than the main light. Otherwise the face will lose volume. If you use a back or rim light, pay close attention so that it does not create excessive reflections on skin, glasses, or shiny clothing.
Background lights are especially useful in catalog and e-commerce work. With them you can achieve an evenly white background or, on the contrary, leave the background darker than the subject. It is important to remember here that background exposure and subject exposure are two separate things. If you try to light a white background only with the main light, the result is often grayish.
Modifiers determine the character of the light
Studio light itself is neither good nor bad. The result is largely determined by the modifier. A softbox is a universal solution for portraits, interview-style shots, and product images because it provides relatively soft, controlled light. An octabox often gives a pleasant, even falloff on the face and natural catchlights in the eyes.
An umbrella is quicker to set up and often more economical, but the light spreads more widely, so control is lower. It can be convenient in less demanding situations, but in more complex studio work a softbox usually gives a more precise result.
Snoots, grids, and barndoors are useful when light spill needs to be limited. For example, in product photography or dramatic portraits, this helps illuminate only a specific area. A grid on a softbox lets you preserve softness while reducing light spill onto the background or other parts of the scene.
The most common mistakes in the studio
One of the most typical mistakes is to shoot too quickly without checking the first test frames at a larger size. On the camera screen everything may look acceptable, but on the computer you will see overexposed foreheads, double shadows, or unwanted wrinkles in the background. That is why test shots in the studio are not a formality, but part of the work.
Another mistake is relying only on light power. If the image does not look right, the problem is not always that the light is too weak or too strong. Often the issue is angle, distance, or modifier choice. If the face looks flat, you do not always need to reduce fill light - the main light may be too close to the camera axis.
The third mistake is ignoring the interaction of the background and clothing with light. Black fabric absorbs light, white reflects it, and shiny materials create specular highlights. The same applies to product surfaces - a matte bottle and a chrome surface require completely different approaches.
A practical approach to portraits and products
If you are photographing a portrait, start with one main light and a reflector. Set the camera manually, take a test shot, and evaluate three things - whether the face is correctly exposed, whether the shadows look convincing, and whether the background is not drawing unnecessary attention. Only then add the next light if it is truly needed.
In product photography, think not only about the light on the object, but also about how the surface is rendered. If you are photographing packaging, the label should be readable and the shapes clear. If you are photographing a shiny object, the best solution is often a larger, softer area of light and carefully controlled reflections. Flags, diffusers, and precise stand positioning help here.
If studio equipment is needed for a specific project rather than everyday work, rental is sometimes a more rational solution. This especially applies when you need to test different types of lights, power levels, or modifiers before making a purchase decision. Such an approach allows you to work with suitable equipment without unnecessary compromises.
When theory is not enough
Even with a good understanding of the principles, practice determines a lot in studio work. Two identical power settings can produce different results if the room size, ceiling color, background, or object surface changes. That is why there is no single universal setting that will work in every situation.
This is exactly where a professional approach to equipment choice helps. If you know what you will photograph, it is easier to choose the right type of light, modifier, and stand configuration. And if you are still testing your workflow, it is worth considering a solution that lets you compare equipment in practice rather than only by specifications.
Studio lights are not meant to be handled by guesswork. When you understand one principle - the direction, size, and distance of the light determine the character of the image - everything becomes much simpler, and each next frame is made more intentionally.
Frequently asked questions
Why is it worth shooting in manual mode in the studio?
Manual mode ensures consistency between shots — exposure does not change when the light settings or composition change. It makes color and lighting matching easier later and is essential for batch or product photography.
How do I choose between a softbox, octabox, and umbrella?
The choice depends on the needed light area and control: a softbox gives precise, controlled softness; an octabox creates a more even falloff and catchlights in the eyes; an umbrella is quick and cheaper, but with less control. In practice, if you need precise control, choose a softbox or octabox.
How should I handle shiny objects to reduce unwanted reflections?
Use a larger and softer light source, control the light angle, and use diffusers, flags, or grids to isolate light areas. Sometimes it is more effective to light a reflector or a white surface instead of the object directly to get a more even reflection.
How do I find the correct camera settings for the studio?
Start with ISO 100–200, a shutter speed appropriate for flash sync (e.g., 1/160–1/200 s), and aperture depending on the required depth of field (portraits f/5.6–f/8, products f/8–f/11). Take test shots and adjust the settings based on the result on the computer.
Why take test shots — can’t I just shoot the main series right away?
Test shots reveal problems that may not be obvious on the camera screen, such as blown highlights or unevenness in the background. Fixing mistakes early saves time and ensures a consistent, high-quality result for the whole series.
When do I need to add a second or third light?
Add additional lights only when they have a clear purpose — fill light for softening shadows, background light for separation, or a rim light for accents. If used without a plan, they can lower image contrast and reduce the effect of the main light.
Useful links
- Gaismas veidotāji - Link page about modifiers (softbox, grids, snoots) and other equipment mentioned in the article.
- Priekšmetu foto galdi - Points to solutions for product photography, especially photographing shiny objects and small items.
- Gaismas kastes - Useful for product photography and creating soft, even lighting recommended by the article.
- LED VLOG gaisma - Information about continuous LED lights and their impact on shutter speed and exposure.
- NOMA - Equipment rental is mentioned in the article as a practical solution for testing before buying.