
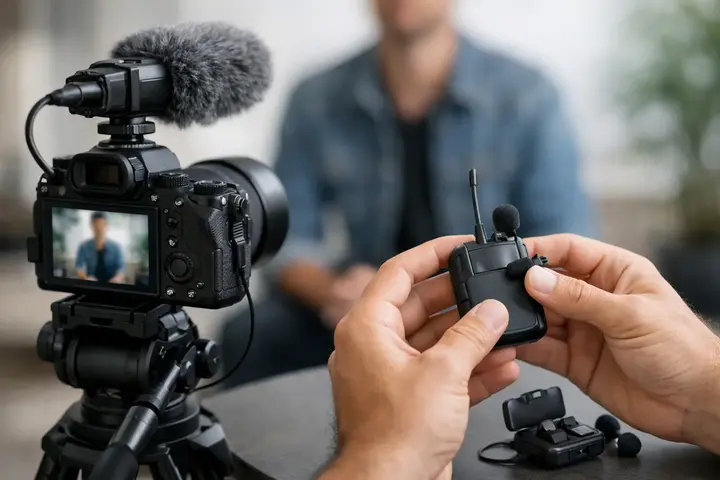
In filming, errors in the audio chain are usually only noticed after watching the recording, when reshooting is no longer possible. That is why the question of how to set up a wireless microphone is not just about switching devices on. You need to choose the correct connection, match sound levels, check the radio environment, and ensure that the microphone is positioned properly on the person’s clothing.
A wireless system usually consists of a transmitter, a receiver, and a microphone capsule. The transmitter is attached to the speaker or used as a compact microphone, while the receiver connects to a camera, recorder, or phone. In professional systems, external antennas, timecode solutions, and separate recorders can also be added to these elements.
In brief
- Before filming, fully charge the devices, check storage and firmware.
- Connect the transmitter to the receiver, verify the correct cable (TRS/TRRS/USB-C/Lightning), and set the camera mic/line setting correctly.
- Choose a clear frequency (UHF or 2.4 GHz depending on the environment) and place the antennas in a clear line of sight.
- Position the lavalier microphone 15–20 cm from the mouth, avoid rubbing, and secure the cable.
- Always record a 20–30 second test clip and listen with headphones; use a safety track if possible.
What to choose for different tasks
| Task | Solution | Why |
|---|---|---|
| Studio interviews | A two-channel receiver with separate transmitters for each speaker and a safety track on one channel with -6 to -12 dB headroom. | Separate recording controls make editing easier and allow individual voice level adjustments; a safety track protects against overloads. |
| Phone vlogs | A digital USB-C or Lightning receiver or a direct TRRS connection with a verified app and headphone monitoring. | A digital connection reduces the risk of analog conversion errors and often provides a more stable signal with lower noise. |
| Large events and conferences | A professional UHF system with frequency scanning and pre-planned frequencies; a backup transmitter or separate recorder. | 2.4 GHz can be crowded; UHF allows better avoidance of interference from other networks and provides greater reliability. |
| Outdoor reporting and on-the-go interviews | Use a lavalier microphone in the correct position, secure the cable, and, if needed, use a wind filter or a small handheld shield. | Proper placement and preventing rubbing significantly reduce clothing noise and improve speech intelligibility |
| Live streaming or podcasting with a computer | Connect the receiver as a USB audio device, disable automatic gain control, and use separate monitoring headphones. | Direct USB integration provides simple setup, but disabling automatic adjustment prevents unexpected level changes. |
Prepare the system before filming
First, fully charge the transmitter and receiver batteries or insert fresh batteries. Do not rely only on the last bar of the indicator - especially during long events, interviews, and ceremonies. If the system supports internal recording, also check the free memory and format the card or internal storage once previous files have been safely backed up.
After turning it on, connect the transmitter to the receiver. On some kits this happens automatically, while others require pairing mode. The connection is established only when the receiver display shows a stable radio signal and the audio level indicator responds when you speak into the microphone.
Check whether both devices have up-to-date firmware. This is especially important for wireless systems that connect to a phone, offer 32-bit float recording, or operate in multiple radio frequency bands. The components of one system must be compatible not only physically but also at the software level.
How to set up a wireless microphone for a camera
Secure the receiver in the camera’s hot shoe or on a camera rig. Then connect the receiver’s audio output to the camera microphone input with the appropriate cable. A camera usually requires a 3.5 mm TRS cable, while a phone often needs TRRS, USB-C, or Lightning connection. 3.5 mm cables that look similar in form are not always electrically identical, so the wrong cable can cause silence in one channel or a complete lack of signal.
In the camera’s audio menu, make sure the external microphone input is enabled. If the camera offers a choice between microphone and line input, check the wireless receiver documentation to see which mode to use. A microphone-level output is usually intended for the camera’s mic input, while a line-level signal is stronger and can overload the camera if connected to the wrong input.
A good starting point is to lower the camera preamp to a low but not minimum level and set a sufficient output level on the receiver. This approach reduces noise generated by the camera’s preamp. However, there is no universal number: camera input sensitivity, receiver output power, and the speaker’s voice all vary. Therefore, levels should always be set with a real test recording, not just a theoretical setup.
If the receiver is a dual-channel model, each transmitter can be recorded separately to the left and right channels. In interviews, this greatly simplifies editing, since the volume and noise processing for each person can be adjusted independently. A mixed one-channel recording is practical for fast field reporting, but it offers fewer options in post-production.
Connecting to a phone or computer
When filming with a phone, it is preferable to use a system with a digital USB-C or Lightning receiver, if the specific phone model supports it. This eliminates unnecessary analog conversion stages and often provides a more stable connection. Before recording, check whether the camera app you are using actually receives the external microphone signal, because some apps may keep recording audio from the phone’s built-in microphone.
On a computer, the wireless receiver may appear as a USB audio device. Set it in both the operating system input menu and the recording software input menu. For online meetings and live streams, we recommend turning off automatic microphone gain control if it causes audible level fluctuations.
Choose a free frequency and maintain reception
Radio interference is one of the most common wireless audio risks. For UHF systems, use the frequency scan function if available. It finds less congested channels in the specific location. After scanning, synchronize the transmitter with the receiver so that both devices use the same frequency or group and channel.
2.4 GHz systems are often easier to use because they manage frequency automatically. However, Wi-Fi, Bluetooth, and other devices also operate in this band. In a small room they are usually very convenient, whereas at a large conference, exhibition hall, or event with many wireless networks, a professional UHF system with carefully planned frequencies may be the safer choice.
Do not place the receiver antennas behind metal camera parts, your body, or a large battery. Do not wear the transmitter tightly next to a phone, because the mobile connection can create electromagnetic interference. If possible, maintain line of sight between the transmitter and receiver. A crowd of people, concrete walls, metal structures, and working around a corner reduce range much faster than in open space.
Proper microphone placement on clothing
A lavalier clip-on microphone is usually placed 15 to 20 centimeters from the speaker’s mouth - on the shirt placket, collar, or upper chest. The microphone capsule should face the correct direction if the model has a specific orientation. Too low a placement results in a more spacious, quieter sound, while too close a placement increases breath noise and consonants.
The most important thing is to avoid friction. Clothing fabric, a necklace, a beard, a scarf, and the edge of a jacket can create noises that cannot be fully corrected in post-production. Ask the speaker to move, turn their head, and sit down while you listen through headphones. If you hear rustling, change the capsule position or secure the cable with appropriate tape and a mount.
Compact transmitters with built-in microphones can be attached visibly to clothing. This is a quick solution for social media videos, vlogging, and reporting. For formal interviews, a lavalier microphone is often chosen because it allows the transmitter to be hidden and keeps the frame visually cleaner.
Set a safe recording level
Ask the speaker to say a few sentences at the same volume they will use during the actual shoot. Watch the level indicator on the camera, recorder, or receiver. In general, speech peaks should be around -12 dB to -6 dB. This leaves headroom for unexpectedly louder words, laughter, or emphasis.
If the indicator reaches 0 dB or the overload warning lights up, the recording may become distorted. Reduce the level on the transmitter or receiver, not just in the camera automatically. If the sound is very quiet, first make sure the microphone is close enough to the mouth, and only then increase the gain.
If the system offers a safety track, record a second channel at about 6 to 12 dB lower. This can save the material if overload unexpectedly occurs on the main channel. Meanwhile, 32-bit float internal recording provides more room for level recovery, but it does not eliminate the need to position the microphone correctly and control interference.
Always do a headphone recording check
A visual level indicator is useful, but it does not replace listening. Connect closed-back headphones to the receiver or camera and record at least a 20 to 30 second test. Listen not only to the voice but also to the background: ventilation, refrigerator, traffic, computer fans, clothing rustle, and radio interference.
Check the recording on the device where it will actually be stored. Sometimes everything sounds correct in the receiver headphones, but the camera is set to a different input or its recording level is too low. Before an important project, repeat the test even if you have used the system dozens of times - the room, camera, cable, and shooting conditions change.
Common problems and practical solutions
If there is no sound at all, check the transmitter’s mute mode, cable type, the camera’s external input selection, and the receiver channel output settings. If the recording is overloaded, reduce the transmitter or receiver gain and do another test with the loudest expected speech segment.
Periodic signal drops usually indicate obstacles, excessive distance, or a congested radio environment. Reduce the distance, move the receiver, change the frequency, or use the system’s internal backup recording. If you hear a regular rustling noise, first check the microphone mount on the clothing, not the radio link.
For projects where audio is critically important, plan a backup solution: a second microphone, a separate recorder, or a transmitter with internal recording. If the system is needed only for a specific shoot, an appropriate wireless audio kit can also be chosen for rental purposes, consulting Master Foto specialists about the camera, phone, and project requirements.
A properly set up wireless microphone lets you focus on the shot and the conversation, rather than guessing whether the sound will be usable. Spend a few minutes checking the connections, levels, and test recording - it is one of the most valuable steps before pressing the REC button.
Frequently asked questions
How do I choose the right cable between the receiver and a camera or phone?
Choose the cable according to the device input: cameras usually use 3.5 mm TRS, some phones use TRRS, while some modern phones and receivers use USB-C or Lightning for digital audio. Checking before filming will prevent silence or signal loss on one channel.
When is it better to use a UHF system instead of 2.4 GHz?
UHF has an advantage in professional or busy radio environments because frequencies can be planned to avoid interference. 2.4 GHz is convenient for less crowded situations and simple use, but it can be affected by Wi‑Fi and Bluetooth interference.
How do I set the recording level correctly to avoid clipping?
Ask the speaker to talk normally and aim for peaks around -12 dB to -6 dB, leaving headroom for unexpected loud emphasis. If the level reaches 0 dB or the overload indicator appears, lower the output level on the transmitter or receiver and repeat the test.
Why should I use headphone monitoring during every test?
Visual indicator lights do not always reveal rubbing, background noise, or radio interference that is audible in the recording. Listening through headphones lets you fix problems immediately before the actual shoot.
What should I do if intermittent signal dropouts appear?
Check the distance, obstacles between the transmitter and receiver, antenna position, and frequency congestion. If needed, switch to another frequency, reduce the distance, or use the device’s internal backup recording.
How do I avoid rubbing noise when using a lavalier microphone?
Attach the microphone in a stable position 15–20 cm from the mouth, secure the cable with tape or clips, and ask the speaker to move around while you test. If necessary, use a small foam piece or a special windscreen to reduce rubbing.
Useful links
- Bezvadu audio sistēmas - Consultation on wireless transmitters and receivers, suitable for professional UHF systems.
- Rode Wireless GO III Blue lavalier komplekts - A practical example of a portable wireless lavalier kit mentioned in the article context.
- LED VLOG gaisma - For vlog situations, it is recommended to combine good audio with quality lighting to improve the video result.
- Datu Kabeļi - Choosing the correct data and audio cables (USB-C, Lightning) is essential for connections with phones and receivers.
- Mikrofoni Skaņas ierakstīšana (noma) - If a system is needed only for a specific project, suitable equipment can be rented and consultation obtained.
- Kameras zibspuldzes - Receivers are often mounted in the camera hot shoe, so information about mounts is useful.