When a shot only looks good by the window and falls apart as soon as the weather changes, it becomes clear that you won’t get far with random lighting. That is exactly why a studio lighting kit for photography is one of the most important investments in portraits, product photography, and e-commerce content creation. A properly chosen kit provides not only more light, but also control over contrast, color temperature, and repeatability.
In brief
- Choose between studio flashes (flashes) for maximum power/control and continuous LED for photo + video flexibility.
- Sāciet ar divu lukturu komplektu, stabilu gaismas statīvu un vienu kvalitatīvu softbox — paplašināšana ir labāka nekā daudzi lēti papildu lukturi.
- Saskaņojiet gaismas jaudu un modifikatora izmēru ar savu telpu un objektu; pārāk liela jauda nelielā telpā var radīt problēmas.
- For location work prefer battery-powered heads or rent equipment for single projects to test workflows.
What to choose for different tasks
| Task | Solution | Why |
|---|---|---|
| Portraits in a small home studio | Two-source setup: one main light + one fill light, medium softbox(s), stable stands | Gives control over shadows and highlights while fitting limited space; softboxes create flattering, soft light for faces. |
| E-commerce product photography | Moderate-power lights with precise modifiers (small softbox, grids, reflectors) and consistent color temperature | Accurate, repeatable lighting and color control reduce post-processing and keep catalog images consistent across sessions. |
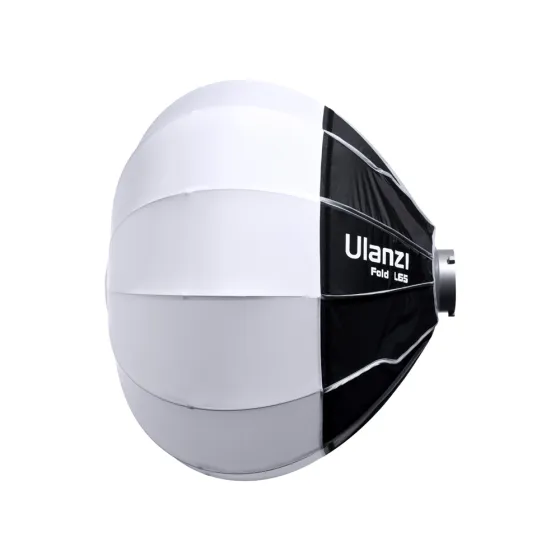
| Content creators doing both photo and video | Bi-color/adjustable continuous LED panels or tubes that offer dimming and color temperature control | LED nodrošina tiešas vizuālas atgriezeniskās saites un novērš mirgošanas problēmas video, vienlaikus daudzos scenārijos joprojām ir lietojams arī statiskiem attēliem. |
| On-location/interior shoots | Battery-powered heads or a mixed kit and consider renting for occasional large jobs | Mobility and avoiding reliance on mains power is key; renting helps validate which kit fits your workflow before buying. |
Frequently asked questions
When should I choose flashlights instead of LEDs?
Choose flashes if your priority is maximum power, lower ISO, and the ability to “freeze” motion. Flashes provide better control with modifiers and are often the first choice in portrait and product photography.
How many lamps are needed for the starter set?
A practically good starting point is a two-light kit: a key light and a fill or background light. This provides enough control for most portrait and product situations without excessive complexity.
How to choose the power according to the room size?
Power should be assessed together with the modifier size and the distance to the subject — in a small space, overly powerful light can be distracting. Think about having extra capacity if you plan to expand your scope of work or use larger modifiers.
Is it better to buy the full set right away or start with renting?
Renting is a good choice if you are unsure about the required type or power, as it allows you to try the solution for a specific project. If you work regularly, buying will pay off, but before making large investments, it is worth testing.
Which modifiers are most often chosen as the first purchase?
The softbox is the most commonly recommended first modifier because it provides soft, even light suitable for portraits and products. Umbrellas are a budget and mobility option, but they give less control over light spread.
What are the most common mistakes when choosing the first set?
The most common mistakes are focusing only on price, choosing a system that is too complicated without a clear need, and ignoring compatibility with accessories. As a result, tripods or mounts may not be stable enough, or the system may not be expandable.
Useful links
- Studio flash kits - Category for complete studio flash kits; matches article advice about choosing a flash kit for photography.
- Studio flashes - Category covering studio flash heads; relevant to the section comparing flashes and LEDs.
- Lighting stands - Svarīgi piederumi: rakstā kā būtiski ir izcelti stabili statīvi.
- Softbox - Softboxes are recommended as the most useful first modifier for portraits and products.
- Photo umbrellas - Lietussargi tiek minēti kā budžeta un mobilā modifikatora alternatīva.
- Studio flash rental - Rental option recommended for testing gear before purchase or for one-off on-location projects.
This choice is not just about how powerful the lamp is. In practice, you need to look at what you will photograph, how much space you have in the room, whether mobility is needed, what the workflow is like, and whether you plan to use the kit only for photo or also for video tasks. A cheap solution may be enough for the first steps, but it will not always be stable enough in the long run.
When a studio lighting kit for photography is really needed
If you photograph rarely and only in daylight, at first it may seem that studio lights are not a priority. However, the situation changes when consistency is required. For product catalogs, portrait sessions, team photos, advertising materials, and social media content, the same result on different days is much more important than improvisation.
A studio lighting kit for photography is especially useful in three cases. The first is working indoors with insufficient or changing natural light. The second is projects where a consistent visual style must be repeated. The third is situations where you need to work quickly and predictably rather than wait for the sun to be at the right angle.
If you are a content creator or a marketing team at a small business, such a kit often pays off faster than it seems. It reduces reshoots, simplifies post-processing, and allows you to work independently of the season and time of day.
![]()
The main question - continuous light or flashes
Before looking at stands, softboxes, and power, you need to decide what type of lights you need. In photography, the most popular solutions are studio flashes and continuous LED light. Both options are usable, but they are not interchangeable in all scenarios.
Flashes provide high light output, allow you to use a lower ISO, a shorter exposure, and more precisely control image quality. They are very suitable for portraits, fashion photography, product shooting, and working with light modifiers. If you need to photograph motion or get a clean, detailed shot with room for editing, flashes are often the right choice.
The advantage of LED lights is that the result is visible immediately. This makes work easier for beginners and is especially useful if video is being filmed alongside photography. However, it should be noted that continuous light at the same price is usually less powerful than flashes. In small spaces this does not always matter, but in larger studios or when working with large softboxes, power may be insufficient.
So the right answer depends on the type of work. If photography is the priority, flashes often win. If you need to handle both photo and video tasks, an LED kit or a combined solution may be more logical.
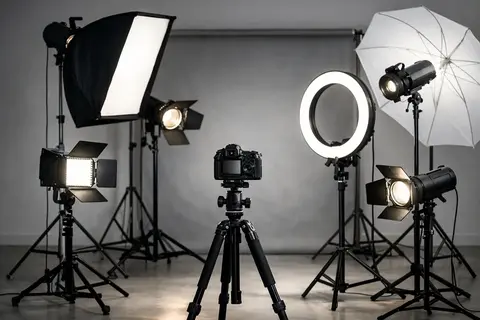
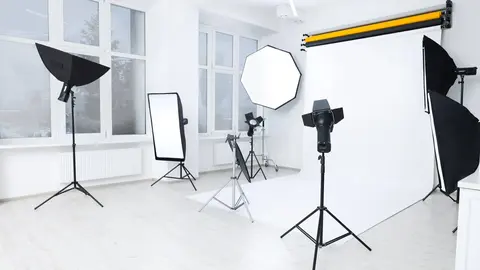
What a good kit usually includes
Many buyers start by asking how many lights are needed. The answer is not always the same, but in most cases a practical starting point is a two-light kit. With one light you can create a quality portrait or product image, but two lights give much more control - one serves as the main light, the other fills shadows or lights the background.
A complete kit usually includes light heads, stands, light modifiers, and a carrying bag. If it is a flash kit, a trigger for the camera is also needed. In some cases the kit will include reflectors, grids, or spare bulbs for the modeling light, but the most important thing is not the number of accessories, but whether the components together form a usable system.
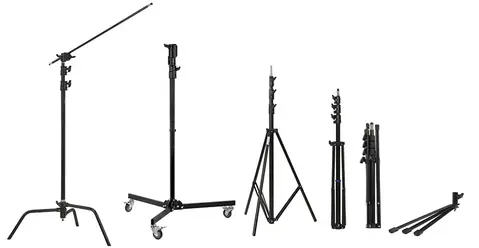
This is exactly where the most common mistake lies - a kit is bought with many items, but with weak-quality stands and limited mounting options. In real work, that creates more inconvenience than benefit. A stable stand and a high-quality softbox are often more valuable than an extra third lamp.
How to choose power and size
Power should be evaluated together with the room, the subject being photographed, and the modifiers used. For portraits in a small room, moderate power may be enough, especially if the light is used close to the model. Product photography for small items also does not require maximum power. On the other hand, full-body portraits, group photos, or large softboxes require a more serious reserve.
There is no point in overpaying just for a larger number in the specifications if you are photographing in a home studio. A too-powerful flash in a small room can even make work harder, because the minimum power will still be too high. On the other hand, if you plan to grow, change locations, or photograph commercial projects, a small reserve is a smart decision.
The size of the light head itself and cooling are also important. Compact solutions are convenient for mobile work, but larger models tend to be more stable during long sessions. If photography happens regularly rather than once a month, build quality becomes just as important as power.
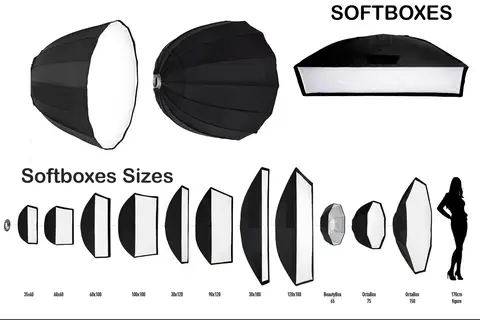
Softbox, umbrella, or reflector
The character of the light is not determined only by the lamp. It is largely shaped by the modifier. This is where the difference between flat, hard lighting and a professionally controlled shot appears.
A softbox is universal and often the best first purchase. It gives soft, predictable light and works well in portraits, product photography, and interview shots. The larger the softbox relative to the subject, the softer the shadows. However, larger modifiers require more space and power.
A umbrella is cheaper, easier to transport, and quicker to set up. It is a good starter option, especially on location. The downside is less control over light spread. In small rooms, this can mean more unwanted reflections on walls and the background.
Reflectors and standard bowls produce harder, more contrasty light. This can be very useful in fashion, sports, or product accent photography. So the question is not which modifier is better overall, but which one helps achieve the specific visual result.
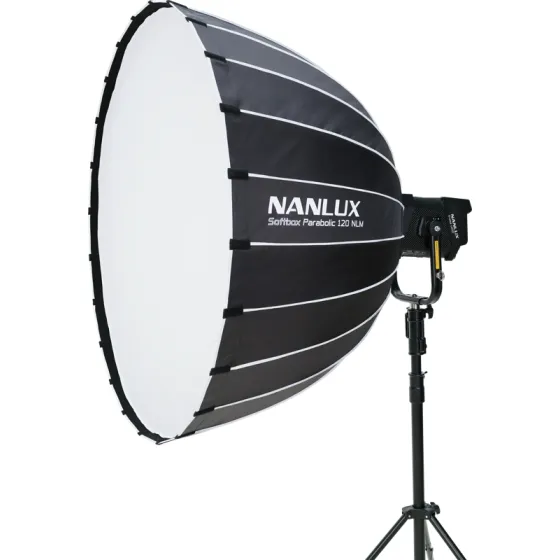 ProductNANLUX PAROBOLIC SOFTBOX 120CM WITH NLM MOUNT SB-NLM-120-PRView product
 ProductUlanzi LAS005 65cm Lantern Softbox with Universal Bowens Mount L061View product
Battery or mains power
If you work in a studio or indoors with stable access to electricity, mains power is still a logical and economical solution. Such kits often offer a good price-to-performance ratio, and you do not have to think about battery life.
On the other hand, for location shoots, events, interior photography, and places without convenient power access, a battery system gives much greater flexibility. You do need to account for a higher price and the need to plan spare batteries. If work takes place in different locations, mobility often outweighs the initial extra cost.
For some users, the best solution is not an immediate purchase, but rental for a specific project. This allows you to test whether the chosen light type, power, and configuration really match your working style. Such an approach is especially sensible if you are still building your studio equipment system.
The most common mistakes when choosing your first kit
The most common mistake is focusing only on price. The cheapest kit is not always the most economical if after a few months you need to replace stands, mounts, or even the entire system. The second mistake is buying a too-complex solution without a clear need. If you photograph simple portraits or small products, you do not need a full studio infrastructure at the start.
The third mistake is ignoring compatibility. Before buying, you should check what mounts are used, whether additional softboxes, grids, beauty dishes, and other accessories will be available. If the system is not expandable, upgrading later becomes expensive.
Another common problem is a poorly assessed space. Low ceilings and narrow rooms require a different setup than a spacious studio. Sometimes a compact two-light system works better in practice than a bulky kit with large modifiers that simply do not fit in the room.
How to understand which kit is right for you
If you photograph portraits in a home studio, look at two lights, one or two softboxes, and a stable stand set. If the main task is product photography for an online store, precise light control, consistent color temperature, and the ability to work with backgrounds and reflections will be important. If you create content in both photo and video formats, an LED system with adjustable color temperature may be more practical than a classic flash kit.
For more experienced users, the choice is often not between a good and a bad solution, but between two different work scenarios. In one case, the priority is maximum power and system expandability. In the other - mobility, quick setup, and simple logistics. Therefore, the correct question is not only "which kit to buy", but "what kind of work will you use this kit for over the next 12 months".
If this question is not yet fully clear, it is worth evaluating not only the purchase, but also consultation or testing before making a decision. In the case of Master Foto, the advantage is that you can compare categories in one place, get practical explanations, and also evaluate the rental option if a specific project requires a different setup than everyday work.
Good lighting is not just a technical improvement. It is a tool that makes work more predictable, faster, and commercially safer. If the kit matches your space, tasks, and workflow, it will serve not as a compromise, but as a solid foundation for a better result in every session.