
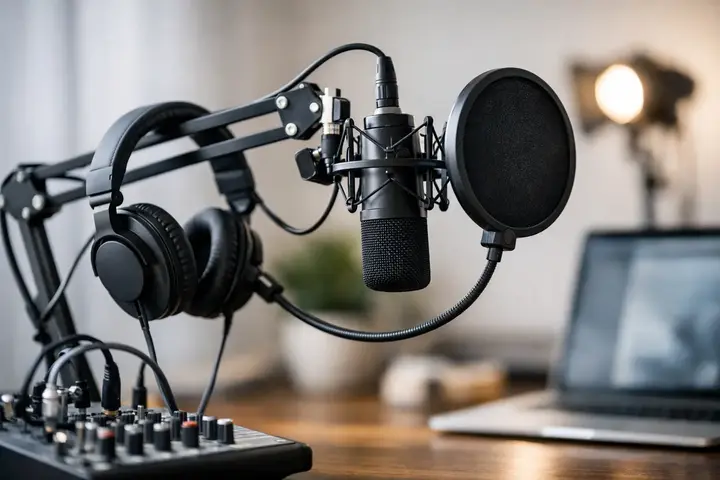
The first podcast recording often fails not because of the idea, but because of the sound. Listeners will forgive simple visuals, but not a boomy room, breaths hitting the microphone, and a conversation where one person sounds loud while the other sounds as if they are in the next room. That is why the question of what is needed for a podcast recording is really a question of how to achieve a reliable, clean, and repeatable result.
A podcast recording does not need a complicated studio from day one. What is needed is the right minimum setup and an understanding of which elements affect the sound the most. These are usually four - a microphone, a recording device or computer, headphones, and the room. The rest depends on the format, the number of people, and how flexible a system you want to build in the long term.
In brief
- When starting a podcast, the priority is a controlled environment, a good microphone, headphones, and a current recording workflow solution.
- For solo recordings, a quality USB microphone is a convenient starting point; for multi-speaker recordings, use XLR microphones with an audio interface or a portable recorder.
- Acoustics and microphone placement often affect sound more than more expensive gear; use rugs, curtains, and speak close to the microphone.
- Monitoring with closed-back headphones, reliable cables, a stand, and a pop filter significantly reduces the risk of recording errors.
What to choose for different tasks
| Task | Solution | Why |
|---|---|---|
| Solo podcast at home | USB microphone, closed-back headphones, a stable desk stand, and simple recording software | A convenient, quick-to-set-up solution with fewer technical details; enough for a controlled room and one speaker |
| Conversation with two or more participants in a studio or at home | Two XLR microphones, a two-channel (or more) audio interface or a portable recorder, additional headphone outputs | Allows separate channel control, reduces crosstalk, and enables better editing after recording |
| Video podcast (audio + camera) | High-quality microphone (USB or XLR with interface), stable camera, consistent lighting, and a desk/boom stand for the microphone | Video adds a technical layer — audio is still the priority, but a repeatable visual and lighting setup is needed |
| Recordings outside the studio / on location | Portable recorder with XLR inputs or a battery-powered USB solution and a dynamic microphone | A portable recorder reduces dependence on a computer and is less sensitive to local technical problems |
What is needed for a podcast recording at home
If the recording takes place at home, the most important thing is not the most expensive microphone, but a controllable environment. A hard, empty room with echo will ruin the recording even with good equipment. Meanwhile, a room with soft surfaces, curtains, a carpet, and fewer reflections often delivers surprisingly good results even with mid-range gear.
For a home podcast, one or two microphones, an audio interface or a USB microphone, and a computer with editing software are usually enough. If you are recording alone, the simplest start is a quality USB microphone and closed-back headphones. If two or more people are involved in the conversation, a more practical solution will be XLR microphones with an audio interface or a portable recorder, because that provides a more stable signal and easier control over levels.
There is an important compromise here. A USB microphone is faster and simpler, but an XLR system is more flexible if later you want to connect several microphones, adjust channels separately, or improve the chain.
The microphone - the most important decision
In podcasts, dynamic or condenser microphones are used most often. Both options work, but not in the same conditions.
A dynamic microphone is a very practical choice for untreated rooms. It picks up less background noise, echo, and ambient sound. If you are recording in an office, living room, or small studio without proper acoustic treatment, a dynamic model will often be the safer option. It requires speaking closer to the microphone, but that is usually an advantage for podcasting.
A condenser microphone captures more detail and air in the voice, but it is more demanding regarding the room. If there is echo, a computer keyboard, traffic noise, or a fan, all of that will be much more noticeable in the recording. That is why a condenser microphone is a good tool if the environment is under control and you know how to use it.
Microphone pickup pattern is also important. A cardioid pattern is the safest choice for podcasting because it focuses on sound from the front and picks up less from the surroundings. An omnidirectional microphone is rarely the best option in this format unless you intentionally want to create a spatial group recording.
USB or XLR
A USB microphone is suitable for a solo podcast, remote interviews, and a simple workflow. You plug it into the computer, select the device in the software, and record. Fewer components mean fewer errors.
An XLR microphone is the logical step if priority is quality, scalability, and control. It will require an audio interface or recorder, as well as a separate cable, but the benefit is a more professional system. If you plan regular recordings with guests, it usually pays off.
Audio interface or recorder
If you choose an XLR microphone, you cannot do without a signal chain. An audio interface connects the microphone to the computer and converts the analog signal into digital form. You do not need to look for the most complex device here, but rather a stable model with a sufficient number of inputs, a low noise level, and convenient monitoring.
For one person, a two-channel interface is enough. For a two-host or interview format, it is better to look immediately at a model with at least two independent microphone inputs and headphone monitoring. If recordings take place in different locations, a portable recorder is often more practical than a stationary interface. It allows you to work without a computer, which reduces technical risk on site.
The principle of it depends applies here again. If recordings always take place in one place at a computer, an interface will be a rational solution. If the format is mobile, a recorder will be more flexible.
Headphones are not an accessory, but a control tool
In podcast recording, headphones are often underestimated. They are not only for comfort. They let you hear clicks, clipping, breath hits, cable contact issues, and other things in time - things that are difficult or impossible to fix later in editing.
For recording, it is better to use closed-back headphones. They let less sound out, so the signal does not get back into the microphone. Open-back headphones are more pleasant for long listening sessions, but in a recording situation they are usually not the first choice.
If several people are participating in the studio, headphone distribution also needs to be considered. Sometimes a headphone amplifier or an interface with multiple outputs is necessary. It is a small detail until the third participant is sitting without monitoring and speaking too loudly or too quietly.
The room affects more than many expect
In the question of what is needed for a podcast recording, the room is one of the most important points. Even a good microphone cannot fully save a hard, empty room. Echo creates a cheap and distant sound that the listener notices immediately.
A good podcast room does not necessarily need to be professionally acoustically treated. Often simple measures are enough - record in a smaller room, away from windows, turn off fans, remove loud objects, use curtains, carpets, and soft surfaces. Microphone placement also helps. The closer the speaker is to the microphone, the less room sound gets into the recording.
If you are recording a video podcast, you also need to think about the compromise between sound and the frame. A bare, visually neat interior does not always sound good. Sometimes a better result comes from a less minimalistic room that works correctly acoustically.
Stand, pop filter, and cables
These are not glamorous purchases, but they directly affect the result. A microphone stand keeps the position stable and reduces vibrations from the table. For podcasting, a desk boom-type mount is often more convenient because it allows you to place the microphone precisely at mouth level.
A pop filter or foam windscreen helps control plosives - p, b, and similar sounds that create an air blast on the diaphragm. If you have ever heard a recording where every word with p sounds like a hit, this element was either missing or not used properly.
Cables are also not a place for chance. A poor-quality or worn XLR cable can cause noise, dropouts, and an unstable signal. In a podcast workflow, a reliable foundation is always more valuable than one expensive but isolated component.
Software and recording format
Recording also requires a program that allows you to reliably record multiple channels, check levels, and then edit. At a basic level, a simple audio editor is enough, but it is important that it supports your workflow. If you record each voice on a separate track, editing becomes much easier.
It is preferable to record in an uncompressed format such as WAV. It takes up more space, but preserves full quality. The final publication can be compressed, but the source material is better kept as clean as possible. Attention should also be paid to levels. A recording that is too quiet increases the risk of noise after processing, while one that is too loud creates distortion that is difficult to recover.
If you are recording a video podcast
A video podcast adds another technical layer. Then, in addition to the audio solution, you will need a camera, lens, lighting, and a stable frame setup. A common mistake here is that the entire budget goes to the camera, while audio is left in the background. In a podcast format, priority should still be given to sound.
Lighting also matters. Inconsistent lighting creates an unprofessional impression and complicates editing. If you record regularly, it is worth creating a repeatable setup with the same light sources, stands, and camera positions. That saves time in every next session.
If not all equipment needs to be permanently available right away, rental can be a rational step. It allows you to test different microphones, recorders, lights, or cameras in a real project and only then make a purchase decision. This approach is especially useful for teams that are only testing the podcast format or planning seasonal content production.
How to assemble a starter setup without overpaying
Practically speaking, a podcast start is not about maximum specifications, but about balance. A solo creator needs a quality USB or XLR microphone, closed-back headphones, a stable stand, and a quiet room. A two-person conversation already requires two microphones, a suitable interface or recorder, and the ability to monitor both participants.
If a company, marketing team, or media outlet is creating a podcast, repeatability becomes important. In that case, the point is not the cheapest solution, but a system that can be set up quickly, used regularly, and easily expanded. This is usually where the right conversation with a technical specialist begins, because a solo creator at home is one niche, while a multi-host video podcast with guests is something entirely different.
If you are not sure what is needed for a specific format, it is worth starting from the recording scenario, not from brand comparisons. How many people will speak, where will the recording take place, will there be video, do you need to work on location, how quickly does the material need to be handed over for editing. When the answers are clear, the equipment chooses itself much more logically. With this approach, even a Master Foto consultation becomes much more precise, because the need is defined not abstractly, but in a real workflow.
A good podcast does not start with a perfect studio. It starts with a sensibly assembled setup where every part does its job and does not interfere with the content sounding convincing.
Frequently asked questions
Can you start a podcast with just a cheap USB microphone?
Yes — a USB microphone is a good start for a solo creator because it is easy to connect and does not require extra devices. However, if you plan to have many guests or a scalable system, an XLR solution may later be more flexible.
How do you choose between a dynamic and a condenser microphone?
A dynamic microphone usually works better in untreated rooms because it picks up less background noise and echo. A condenser microphone provides detail and a sense of air in the voice, but it requires better acoustics and a quieter environment.
Why is monitoring with headphones so important?
Headphones let you hear clicks, clipping, breath pops, and cable contact issues in real time, which are hard to fix after recording. For recording, closed-back headphones are recommended so sound does not bleed back into the microphone.
How can you reduce echo in a recording room without acoustic treatment?
Use a smaller room with soft surfaces, move the microphone closer to the speaker, and place curtains, rugs, or furniture to reduce reflections. Also turn off fans and other background noise sources before recording.
What file format is better for recording?
It is better to store initial recordings in an uncompressed format such as WAV because it preserves maximum quality for processing. For final publication, you can use a reasonably compressed format, but avoid excessive compression before editing.
Do cables really affect recording quality?
Yes — worn or low-quality XLR cables can cause noise, contact issues, and signal instability. A reliable cable base reduces technical risks during recording sessions.
Useful links
- XLR cable 3m (pro snake TPM 3,0) - Cables and XLR connections — important for a reliable signal in podcasts.
- XLR cable 6m (sssnake SM6BK) - Longer XLR cables for studio or video recordings when the microphone is not right next to the computer.
- XLR patch cable 50cm (TPD-3) - Convenient connections to interfaces and panels — useful for studio workflow.
- Microphones (category) - Browse the microphone selection to compare dynamic and condenser microphones.
- Audio cables, adapters (category) - Cables and adapters needed for XLR/USB connections and reliability.
- Boya Boom Arm K171 (microphone holder) - A boom stand provides convenient and stable microphone positioning during recordings.