
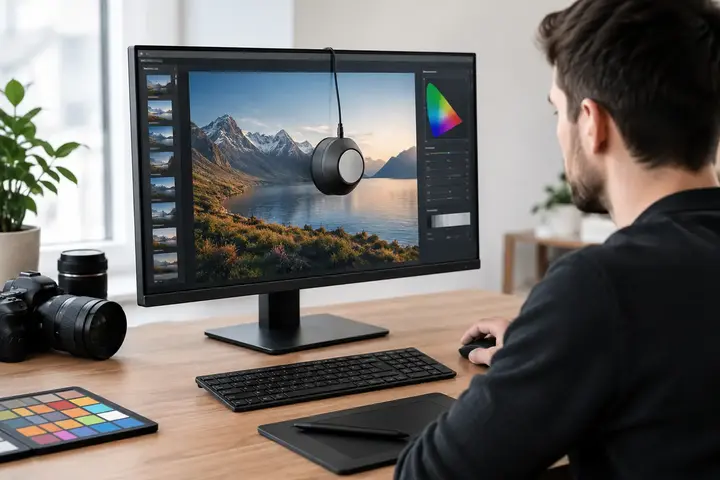
A photo may look flawless on screen, but after printing or sending it to a client, it can become too dark, too warm, or too saturated. In such cases, the problem is not always the camera, lens, or image processing. Often it is the monitor. Knowing how to calibrate a monitor makes it possible to ensure that decisions made during editing about exposure, white balance, and skin tones are predictable outside your workspace as well.
Monitor calibration is not only a requirement for professional retouchers or print studios. It is an essential part of the workflow for anyone who edits photos, cuts video, creates product images for e-commerce stores, or prepares visual materials for clients. The more important color accuracy is, the less room there should be for guesswork.
In brief
- Calibrate the monitor with a colorimeter and create an ICC profile to ensure consistent colors in photo and video work.
- Before measuring, warm up the monitor for 20–30 minutes, turn off dynamic modes, and use a high-quality cable at the native resolution.
- Targets for photo work: D65 (~6500 K), gamma 2.2, brightness 80–120 cd/m² depending on working light.
- For video work, choose the color space according to the delivery format (e.g., Rec.709 SDR), and television or cinema delivery will require different equipment.
- Recalibrate regularly (about once a month in intensive work) and check the ICC profile in the operating system after calibration.
What to choose for different tasks
| Task | Solution | Why |
|---|---|---|
| Product photography for e-commerce stores | Calibrate the monitor with a colorimeter, choosing D65, gamma 2.2, and brightness 100–120 cd/m²; control studio lighting with stable LED lights. | Product images should be edited so that colors match the real product; stable lighting and a calibrated monitor reduce customer complaints about color mismatches. |
| Photo preparation for print | Choose lower brightness (80–100 cd/m²) according to the print environment, keep the ICC profile, and check test prints. | The printing process usually has a smaller dynamic range; suitable monitor brightness helps avoid regular overexposure in files. |
| Video editing for web and social media | Calibrate for computer monitor work (D65, gamma 2.2) and use a calibrated monitor for preview; if needed, check Rec.709 for television deliveries. | Web content is viewed on different devices, so a practical compromise helps better predict results for a wider audience. |
| Photo editing on a laptop | Connect the laptop to power, turn off automatic brightness adjustment, and calibrate the screen with a colorimeter; consider using an external calibrated monitor for long-term work. | Portable computers often change brightness and color depending on power mode; an external calibrated monitor provides a more stable reference point. |
Why factory settings are not enough
A new monitor is often configured at the factory to look bright and contrasty on a store shelf. Such an image is attractive, but for photo and video editing it is often too cool, too bright, or artificially saturated. As a result, the editor reduces brightness and saturation more than necessary, but on another screen or in print the file looks dull.
Calibration adjusts monitor behavior to a specific color standard. Profiling, in turn, creates an ICC profile that the operating system and color-managed applications use to display the image as correctly as possible. In everyday use, both processes are often simply called calibration, but in a professional workflow it is worth understanding the difference.
The monitor type also matters. A wide-gamut model can display more colors than a standard sRGB screen, but without a proper profile it can overstate colors in applications that do not use color management. Meanwhile, a budget or older panel may be limited, but it is still worth setting up - this helps achieve a more consistent result within its capabilities.
Preparation before monitor calibration
Before starting, the monitor should be running for at least 20 to 30 minutes. Panel brightness and color temperature can differ immediately after power-on from a stable working state. In professional workflows, an even longer warm-up period is often chosen, especially for large or wide-gamut displays.
Workspace lighting is just as important as software settings. If direct sunlight falls on the screen during the day, but in the evening the room is lit by a warm lamp, the eye will perceive the same image differently. Try to position the monitor so that reflections do not fall on it, and keep lighting similar during editing.
Before measuring, check four practical things:
- reset the monitor picture mode or choose a neutral mode such as Standard or Custom;
- turn off dynamic contrast, automatic brightness, "vivid" modes, and blue-light filters;
- make sure the video card driver does not have artificial color enhancements enabled;
- if you use a laptop, plug it into power and disable automatic screen brightness changes.
The connection type can also affect the result. Use a quality DisplayPort, HDMI, or USB-C connection, select the monitor’s native resolution, and make sure the system is set to full RGB range, not limited video range. Otherwise, blacks and whites may not be correct even before calibration begins.
How to calibrate a monitor with a colorimeter
The most reliable solution is a colorimeter - a measuring device placed on the screen and used together with calibration software. It sequentially measures the color patches shown on the monitor, compares them with the expected values, and creates a correction profile. Visual adjustment by eye can help avoid very incorrect settings, but it cannot replace measurement.
Start with the calibration mode offered by the software. If the monitor supports hardware calibration, corrections are stored in the monitor’s internal table. This is usually a more accurate method because it does not significantly reduce the number of available tonal steps. If that option is not available, the software will create a system ICC profile and a video card correction table. This solution is also fully usable for many photo and video workflows.
During calibration, place the colorimeter in the center of the screen, snug against the panel. It is advisable to tilt the screen back slightly so the device sits flush without gaps and room light does not affect the measurement. The program may prompt you to manually adjust the monitor brightness, RGB channels, or contrast. Make these corrections in the monitor’s menu, not in the editing software.
Recommended target settings for photo work
For most photographers, a D65 white point setting, or approximately 6500 K, is a safe starting point. It corresponds to a widely used daylight standard and is suitable for work in sRGB and Adobe RGB environments.
Gamma 2.2 is a common choice in Windows and macOS environments, as well as for web content. The brightness target is usually 80 to 120 cd/m². The exact value depends on the room and the intended result. In a bright office, 120 cd/m² may be practical, but in a controlled, darker room, 80 to 100 cd/m² is often more suitable for photo editing.
If you regularly prepare files for print, it is not enough to assume that lower brightness is always better. The goal is to match the screen to the workspace lighting and the capabilities of the printing process. If prints consistently seem dark, check the monitor brightness first rather than automatically increasing exposure in every file.
Settings for video editing
In video work, targets should be chosen according to the delivery format. For SDR video material, Rec.709 color space, D65 white point, and gamma 2.4 are often used in a darker controlled room. When editing content for the web, social networks, or corporate videos, the working environment is usually less controlled, so a practical compromise is sometimes needed.
It is important not to confuse a computer monitor with a reference monitor for color correction. A high-quality calibrated computer monitor is suitable for editing, previewing, and many commercial tasks. However, advertising, television, or cinema deliveries with strict technical requirements require an appropriate reference display, a proper video signal chain, and regular verification.
ICC profile and post-calibration check
When the measurement is finished, the software will save an ICC profile. Check that the operating system has actually selected it for the specific monitor. If you use two displays, each must have its own profile - one profile for both screens is not a correct solution.
Open familiar images with neutral gray areas, skin tones, deep shadows, and bright details. The goal is not to make the image dramatically "better-looking." A good result often appears less vivid at first than the factory mode, but it contains more reliability and fewer surprises on export or in print.
The calibration software’s validation report shows how large the measured color deviation is. Small deviations are normal, especially on older panels. If the result is poor, check whether the screen has warmed up, whether the colorimeter is seated correctly against the panel, and whether automatic brightness is turned off. If the monitor cannot achieve the required uniformity or color gamut, calibration will not fix that - it will only accurately show the device’s real limitations.
How often to calibrate and when to consider a different monitor
Monitor parameters change over time. In an active photo or video workspace, calibration should be repeated about once a month. For less intensive work, once every two or three months is enough if the room lighting and monitor mode have not changed. After a major system update, video card replacement, or moving the monitor, it is worth checking the profile again.
If you regularly work with client materials, consider a monitor with a wider color gamut, more even panel illumination, and hardware calibration support. Such an investment is especially justified in retouching, product photography, print preparation, and video color correction. When choosing a monitor, colorimeter, or video equipment suitable for your workflow, Master Foto specialists can help compare practically important features, not just a list of technical specifications.
A calibrated monitor does not replace proper camera exposure, quality lighting, or organized color management in applications. But it does provide a reliable reference point. When you can trust the screen, you can make creative decisions about the image itself instead of fighting unpredictable hardware interpretation.
Frequently asked questions
How often should a monitor be calibrated?
In intensive professional work, it is recommended to calibrate about once a month. In less intensive use, once every two to three months is enough if room lighting and monitor modes are not changed.
What are the safest targets for photo work?
The most commonly used settings are D65 (about 6500 K), gamma 2.2, and brightness 80–120 cd/m² depending on the room. These targets ensure compatibility with sRGB/Adobe RGB workflows and are a good starting point.
Can I calibrate only by eye without a colorimeter?
Visual adjustment helps avoid obviously incorrect settings, but without a colorimeter you will not get an accurate and repeatable result. A colorimeter measures and creates an ICC profile, which is necessary for consistent color management.
What should I do if the monitor cannot reach the desired color space or brightness?
If the monitor cannot reach the targets, calibration will show its real limits, but it will not improve hardware restrictions. Consider a monitor with a wider color space or better uniformity if you work with strict color requirements.
How do I check whether the system is using the new ICC profile?
After calibration, open the operating system's color settings or the calibration software's validation section and make sure the specific profile is assigned to the monitor. If you use multiple screens, each should have a separate profile.
Should video editing use different settings than photo editing?
Yes — video settings should be chosen according to the delivery format; for example, Rec.709 with D65 and gamma 2.4 may be more suitable for SDR television material. For web editing, a practical compromise with D65 and gamma 2.2 is often suitable for previews.
Useful links
- LED light panels - Using stable and neutral lighting in the studio helps choose a suitable monitor brightness measurement during work.
- Light meters - Measuring room light with a light meter helps determine the optimal monitor brightness relative to the ambient lighting.
- Video lights - Controlled video lighting improves preview quality and helps match the editing environment to real shooting conditions.
- Newell Air Artha 30cm LED Light and Talos Light Stand Set - Suitable for portable studio lighting when a stable, adjustable light source is needed for in-monitor editing tests.